After a semester or two, your course listing in Blackboard can become quite messy and it’s difficult to tell which are your current semester courses.
To organize your course listing, go to the My Courses tab and then point your cursor at the far right end of the My Courses module. You should see a settings ‘wheel’ pop up (like below). Go ahead and click on that wheel.

That brings you to a new screen. This will be different for everyone, but the key piece you are looking for is the “Group by Term” selection. Click that box.
If you point your cursor to the far left of the “Select All/Unselect All” section, you will get an up/down arrow (in the square below). Click on the arrow to drag the current semester to the top of the list.
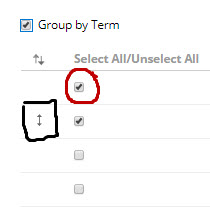
Use the Select/Unselect (in the circle) to deactivate older semesters. The course access is still there, just not visible on the My Courses page. If you find later that you need to access an older semester, you can come back into this area and Select a semester to turn it back on.
Scrolling down the page allows you to select/unselect specific courses, but generally selecting/unselecting terms is the best option.
IMPORTANT: When you are finished, remember to select that “Submit” button that is on the top and the bottom of the page (they both work, chose the one you can see!).
You can update your course listing as needed.
 Step 1: Download and install the
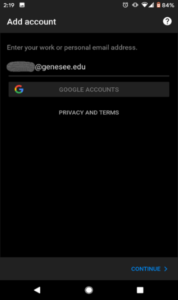
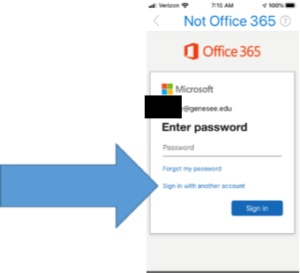
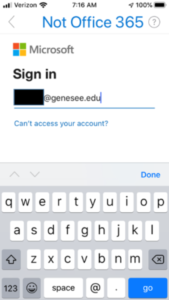
 GCC NetID@genesee.edu [Be sure to use your NetID, not your GCC email address]. Click Continue
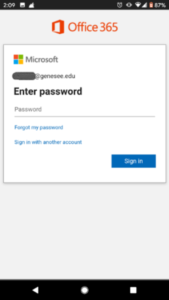
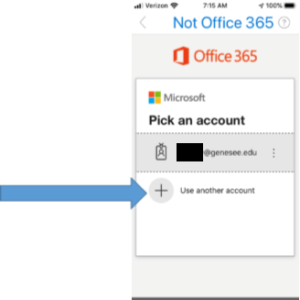
 Step 4: If asked to set up another account, click Skip